CustomSurvey Help page


Once you are logged in, the main screen offers you the tools for managing your surveys and custom view-templates. You can navigate to the edit survey questions screen from this screen.


Managing the surveys

Survey Management screen

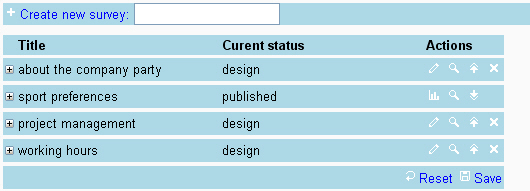
Creating a new survey:
To create a new survey the title must be provided first in the input in the right of "Create new survey" text and then press on "Create new survey". A new survey with the title you've provided will be shown on the bottom of the surveys table.

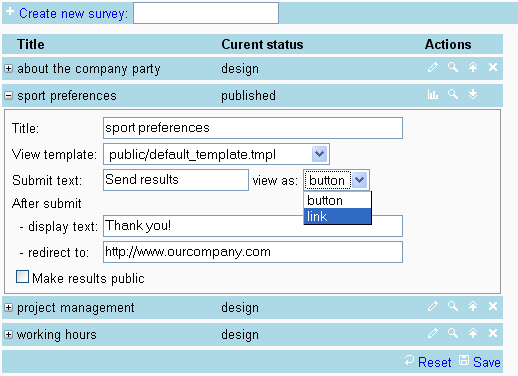
Manage the existing surveys:
The surveys table contains 3 columns:
    - "Title" shows the title you have provided when the survey was created.
    - "Current status" displayes only the status of the survey. It can be "design" which means that the work on this survey is in progress and "published" which means that the work is finished and the survey can be send to receive the answers.
    - "Actions" presents all the actions can be done on the survey depending on its status:

Action  Description Only in status
Edit: move to edit survey questions screen design
Preview: show a preview of the survey design & published
Publish: publish the current survey design
Remove: remove the current survey design
View results: show results published
Unpublish: unpublish the current survey published

By pressing on the left most icon ( or ) found on each row or on the row itself the properties of the selected survey will be displayed/hidden. These properties are editable:

Survey managemns expanded

    - Title: the string that will replace the @SURVEY_TITLE@ variable in the view-template representing the title of the survey
    - View template: selected from the list of public + private view templates.
    - Submit text: this is the text that will be shown on the submit button or link. (this must be provided)
    - After submit display text: the text displayed after the final-user submits the survey.
    - After submit redirect to: after the final-user submits his answers it is possible to redirect the next page to this URL
    - Make results public: if checked the results can be viewed without authentification.

Once a survey published, all you have to do is to send an email to all the people you expect answers from containing the link from "Preview" action which is public and doesn't need any authentication.

Every change will be saved only after the "Save" button is pressed. The changes can be reset with the button "Reset".


Managing the view-templates

View-templates Management screen

The view-template is a HTML page that will be displayed in the preview and result page of the survey. The HTML file can be created by the user but MUST contain the two so-called variables:
    - @SURVEY_TITLE@ : this will be replaced at run time with the survey title
    - @SURVEY_CONTENT@ : this will be replaced at run time with the survey content (depending if it is preview or results).
Here is a sample of such view-template: the default template.
    - @SURVEY_SUBMIT@: this will be replaced at run time with the button/link that submits the answers.

The list of custom view-templates is displayed. This list is managed by:
    - removing selected view-templates (select the templates you want to remove and press "Remove selected templates")
    - adding new view-templates (browse your computer for the template you've created and press "Add custom view template")

When modifing the list of view-templates the changes are also viewed in the "View template" combo-box.


Managing the questions of a survey

Questions management

The edit survey questions screen contains in the left side a handler to each question with all the actions that can be done on the selected question:

Action  Description
Edit: select the question and display its details in the right side

Move up: move the question one step up if possible

Move down: move the question one step down if possible

Quick view: dynamically display a sample of the question as seen in the final version

Delete: Delete the question

With the "Add new question" button you can add an empty question at the desired location as chosen in the combo-box in its right.

Each question details will contain the question text (the question we expect to 
receive the answers for) and a list of answers. These details are shown in the right side of the screen:
    - Question text
    - Allow no answer to this question: if checked, at the run time when the final user submits the answers the question can be left unanswered; in not checked a JavaScript code is generated for this question to force the final user to provide an answer.
    - Type, Subtype & Layout: by combining these 3 options you can create 12 types of answers:

Type Subtype Layout Sample
single selection radio buttons vartical
horizontal
drop-down list
matrix
multiple selection check-box buttons vertical
horizontal
list
matrix
text only multiple lines
single line
numeric value
rank order

    - Allow additional answer: if selected, at run time the final-user has the option to give his own answer and not select one from the list of provided answers.

All the modifications will take effect only after they will be saved by pressing "Save" button.